
You finally booked that dream trip, just you, a camera, and a destination worth remembering. But then reality hits: who's going to take the photos? Mastering solo travel photography tips doesn't require a professional crew or an expensive gear bag. It does require a few smart techniques, the right mindset, and a willingness to get creative with what you have. The good news is that traveling alone gives you complete control over your shots, no compromising on angles, timing, or locations.
The real challenge most solo travelers face isn't finding beautiful backdrops. It's figuring out how to actually get themselves in the frame, and make it look natural, not like a rushed timer selfie on a wobbly rock. Whether you're shooting on a flagship smartphone or a mirrorless camera, there are proven methods that work regardless of your skill level. You just need to know what they are.
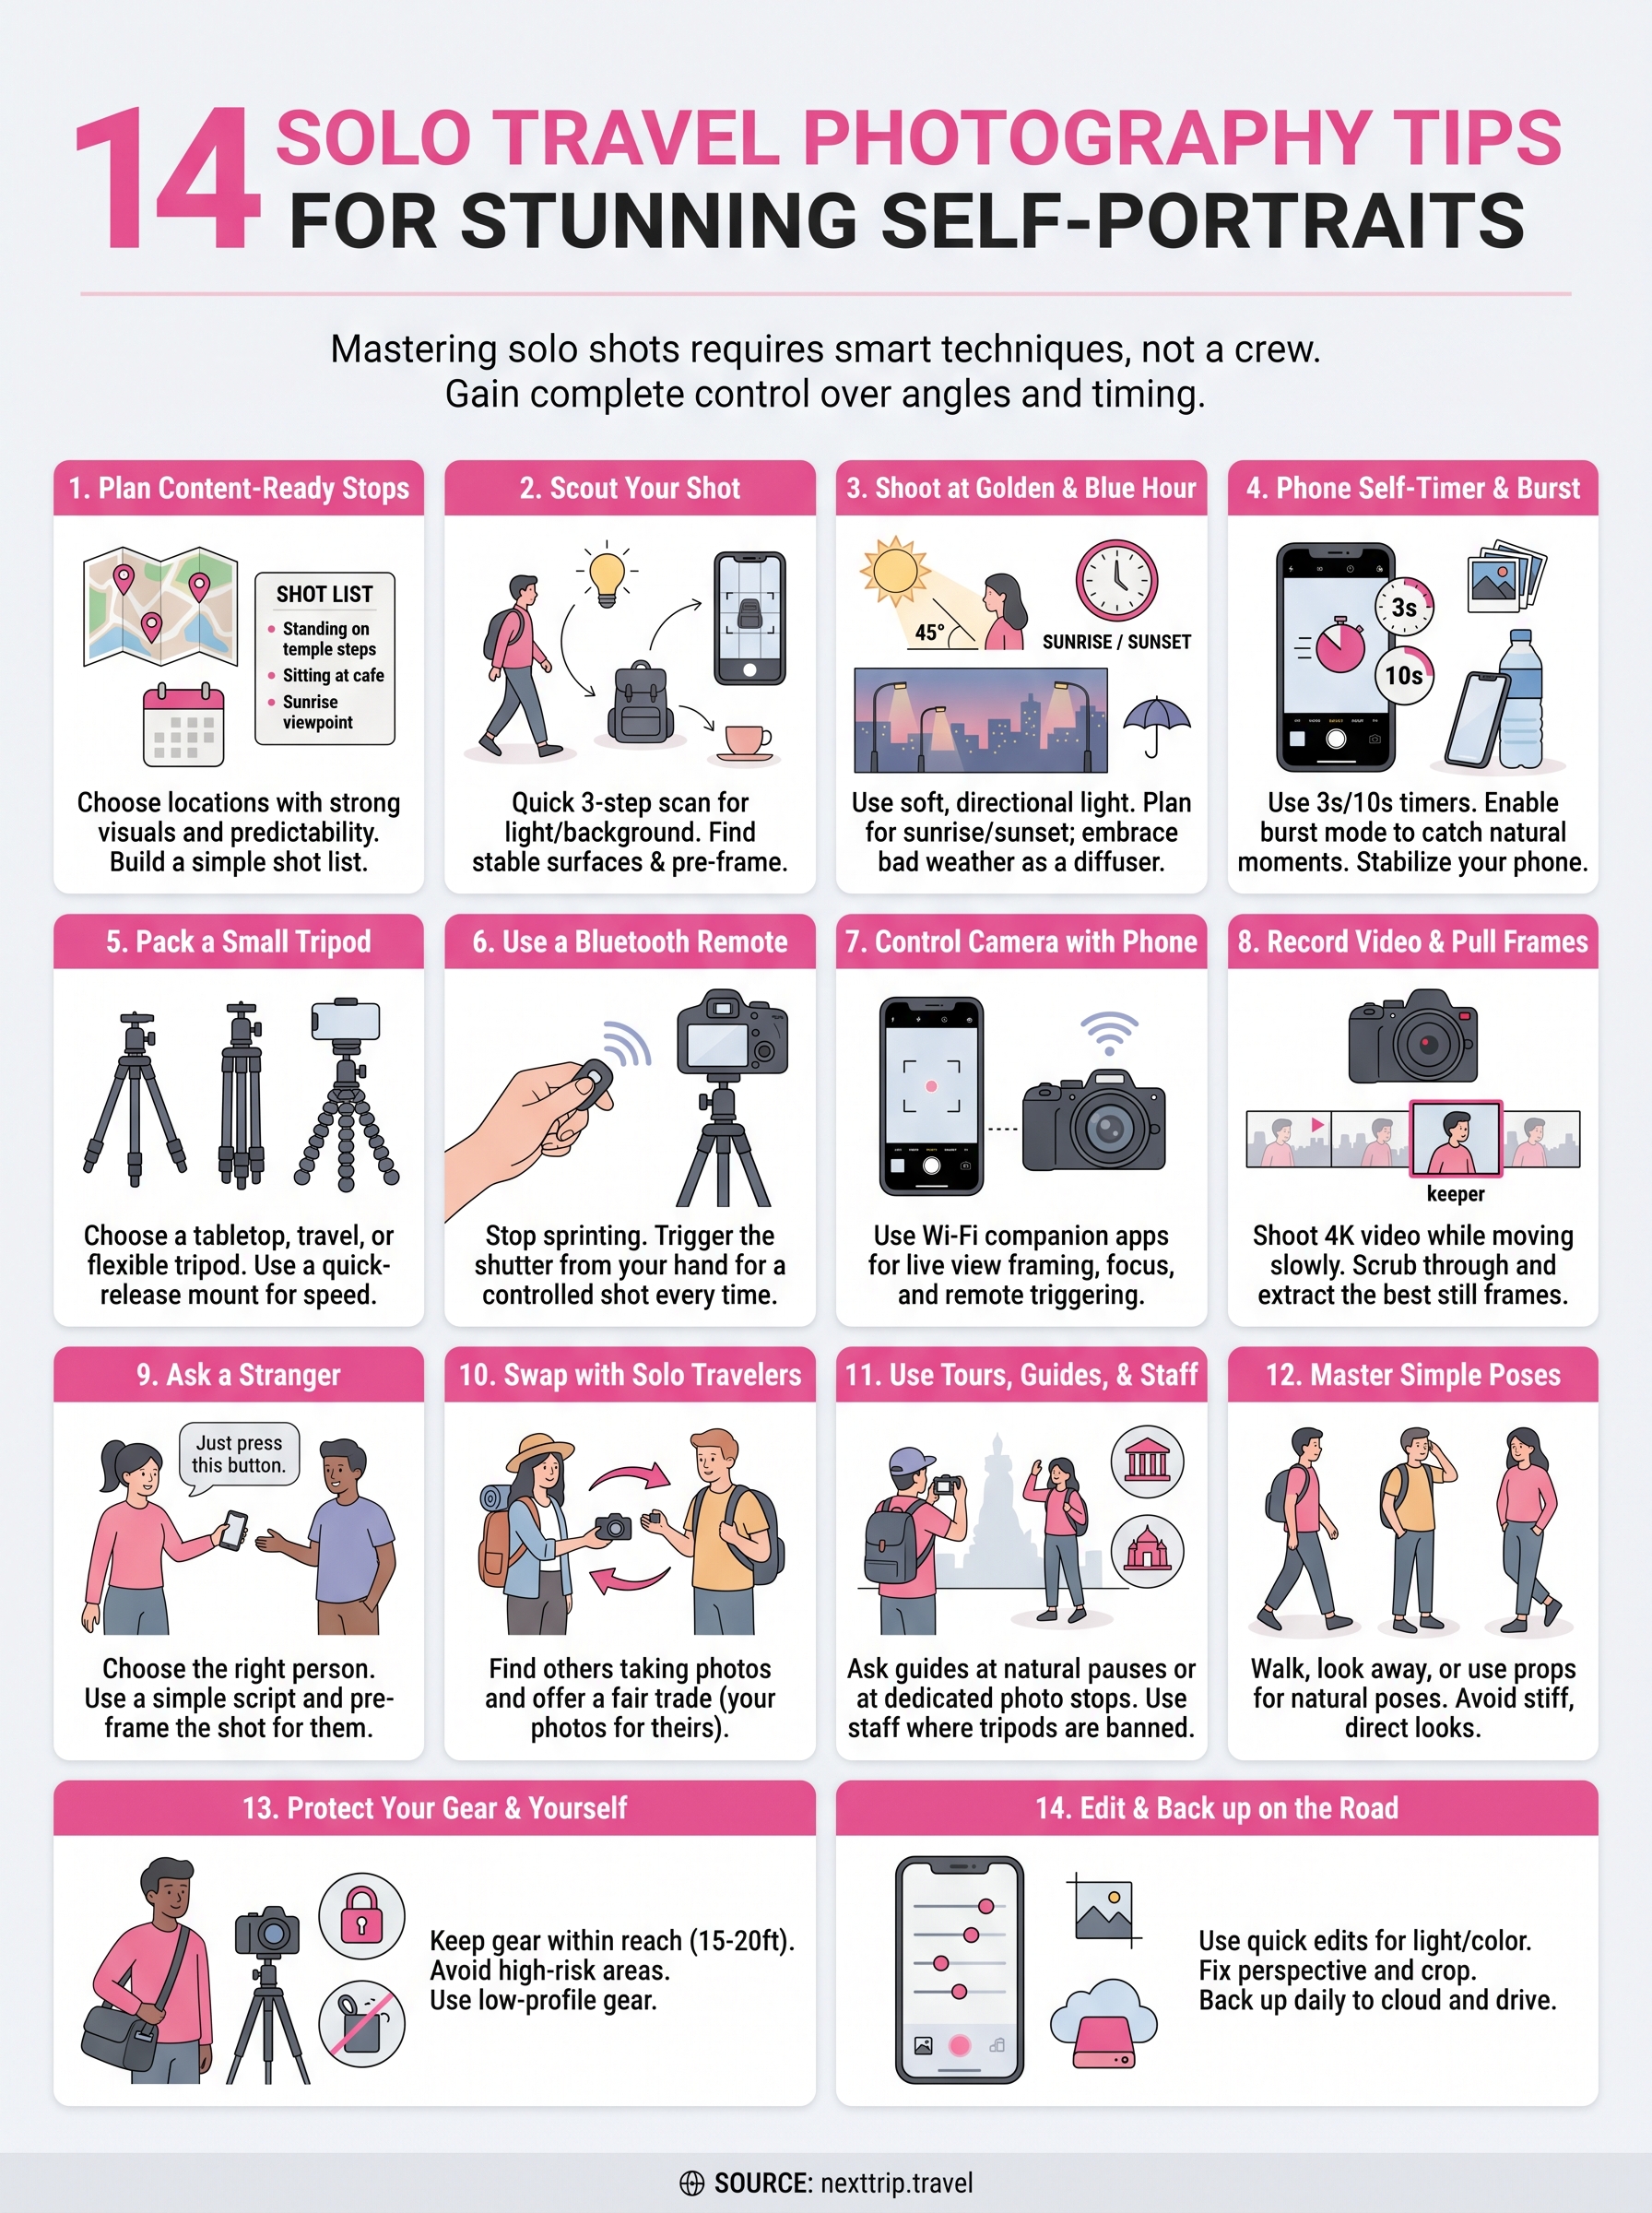
That's exactly what this guide covers. At Nexttrip.Travel, we design itineraries built around content-ready destinations and experiences worth capturing, places handpicked by creators and local insiders for their visual storytelling potential. We know firsthand that a great trip deserves great photos of you in it. Below, you'll find 14 practical tips to help you nail stunning self-portraits on your next solo adventure, from gear essentials and camera settings to posing tricks and editing techniques.
1. Plan content-ready stops with NextTrip.Travel
Most solo travel photography tips focus on technique, but where you go shapes every photo before you even lift a camera. Planning your stops around locations that are visually strong and logistically friendly for solo shooters saves you hours of frustration once you're on the ground. Nexttrip.Travel builds itineraries around exactly this kind of intentional location selection, so you spend less time problem-solving and more time shooting.
Pick locations that make self-portraits easier
Not every beautiful spot is easy to photograph yourself in. Open plazas, wide staircases, and low boundary walls give you stable surfaces to place a camera, clear sightlines, and enough distance to capture your full frame. Narrow alleys and crowded markets look great in a wide shot but make solo shooting difficult because you have no room to back up and no flat surface to work with. When you research a destination, look specifically for unobstructed depth and predictable foot traffic so you can set up and shoot without constantly moving out of strangers' paths.
Build a shot list into your itinerary
Before you leave, write down three to five specific shots you want from each destination. It does not need to be elaborate - a note like "standing on the temple steps at sunrise" or "sitting at the canal-side cafe with coffee" is enough. A basic shot list keeps you focused and stops you wandering aimlessly hoping something clicks. It also helps you identify the right time of day for each location before you arrive.
The most overlooked solo travel photography tip is simple: decide what you want to capture before you get there.
Choose experiences that include built-in photo moments
Some experiences come with natural photo opportunities already built in. Cooking classes, boat tours, and guided hikes place you in a scene where activity replaces forced posing. At Nexttrip.Travel, every curated itinerary is designed around experiences with strong visual and storytelling potential, which means you are already in the right setting at the right time, doing something genuinely worth photographing.
Set boundaries so photos do not run your whole day
The fastest way to exhaust yourself on a solo trip is spending the entire day chasing the perfect shot. Limit your dedicated shooting time to specific windows, such as the morning golden hour and one afternoon location. Outside those windows, you travel and explore normally. This approach keeps your experience genuine and actually produces more relaxed, natural photos because you are not tired and frustrated when the camera finally comes out.
2. Scout your shot before you set up
Jumping straight into setup wastes time and produces mediocre results. One of the most effective solo travel photography tips is to spend two minutes walking a location before you touch your camera. You need to understand where the light falls, what sits in the background, and where you can physically place your gear before any of the technical decisions make sense.
Use a quick three-step scan for background and light
Walk to the spot, turn around, and look at what your camera will actually see. Check for cluttered backgrounds, strong shadows, and distracting signage that will pull attention away from you. Then identify where the light source is so you know whether to face it, angle across it, or reposition entirely.
A two-minute scout prevents a twenty-minute reshoot.
Find stable surfaces and safe camera placement
Look for ledges, benches, walls, and low posts that sit at roughly chest height when you crouch or stand. Uneven ground and loose gravel cause camera shake even with a tripod, so test your surface by pressing down firmly before you commit to a setup.
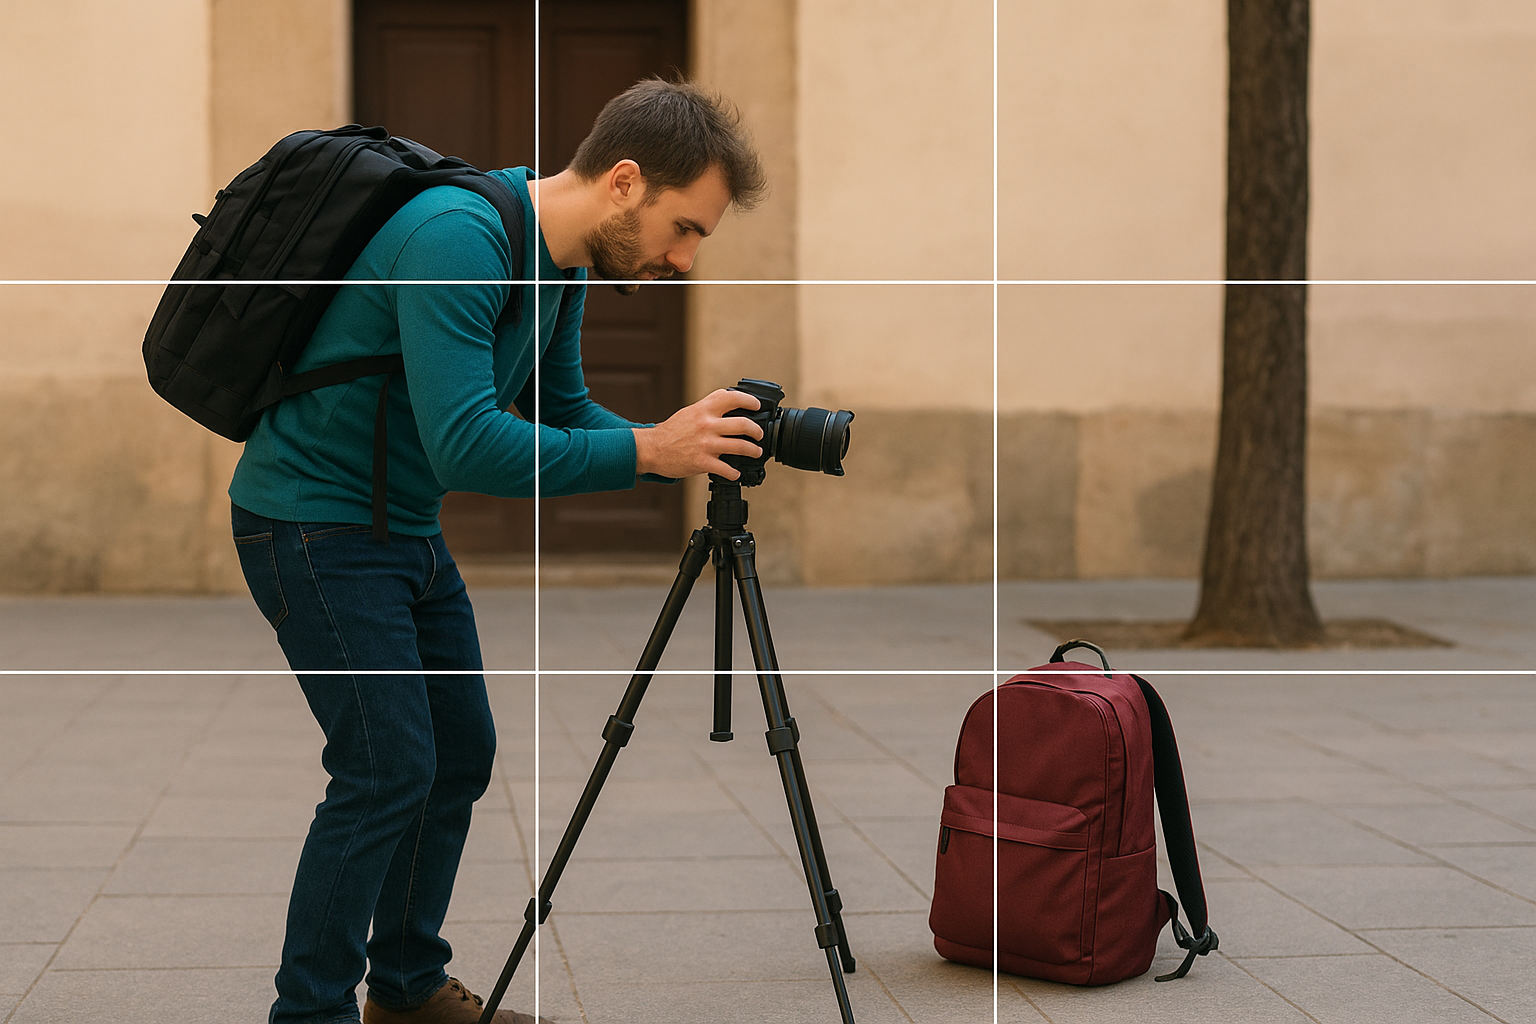
Pre-frame with the grid and a stand-in object
Turn on your camera's grid lines, then place a bag, jacket, or water bottle where you plan to stand. Step back to the camera and check that your stand-in sits inside the frame with the right composition before you start the actual shooting sequence.
Clean up distractions without being disruptive
Move small objects like cups, bags, or loose signage out of frame if they belong to you or sit genuinely in the way. Avoid touching other people's belongings, and keep your adjustments quick so you do not draw unnecessary attention to your setup.
3. Shoot at golden hour and blue hour
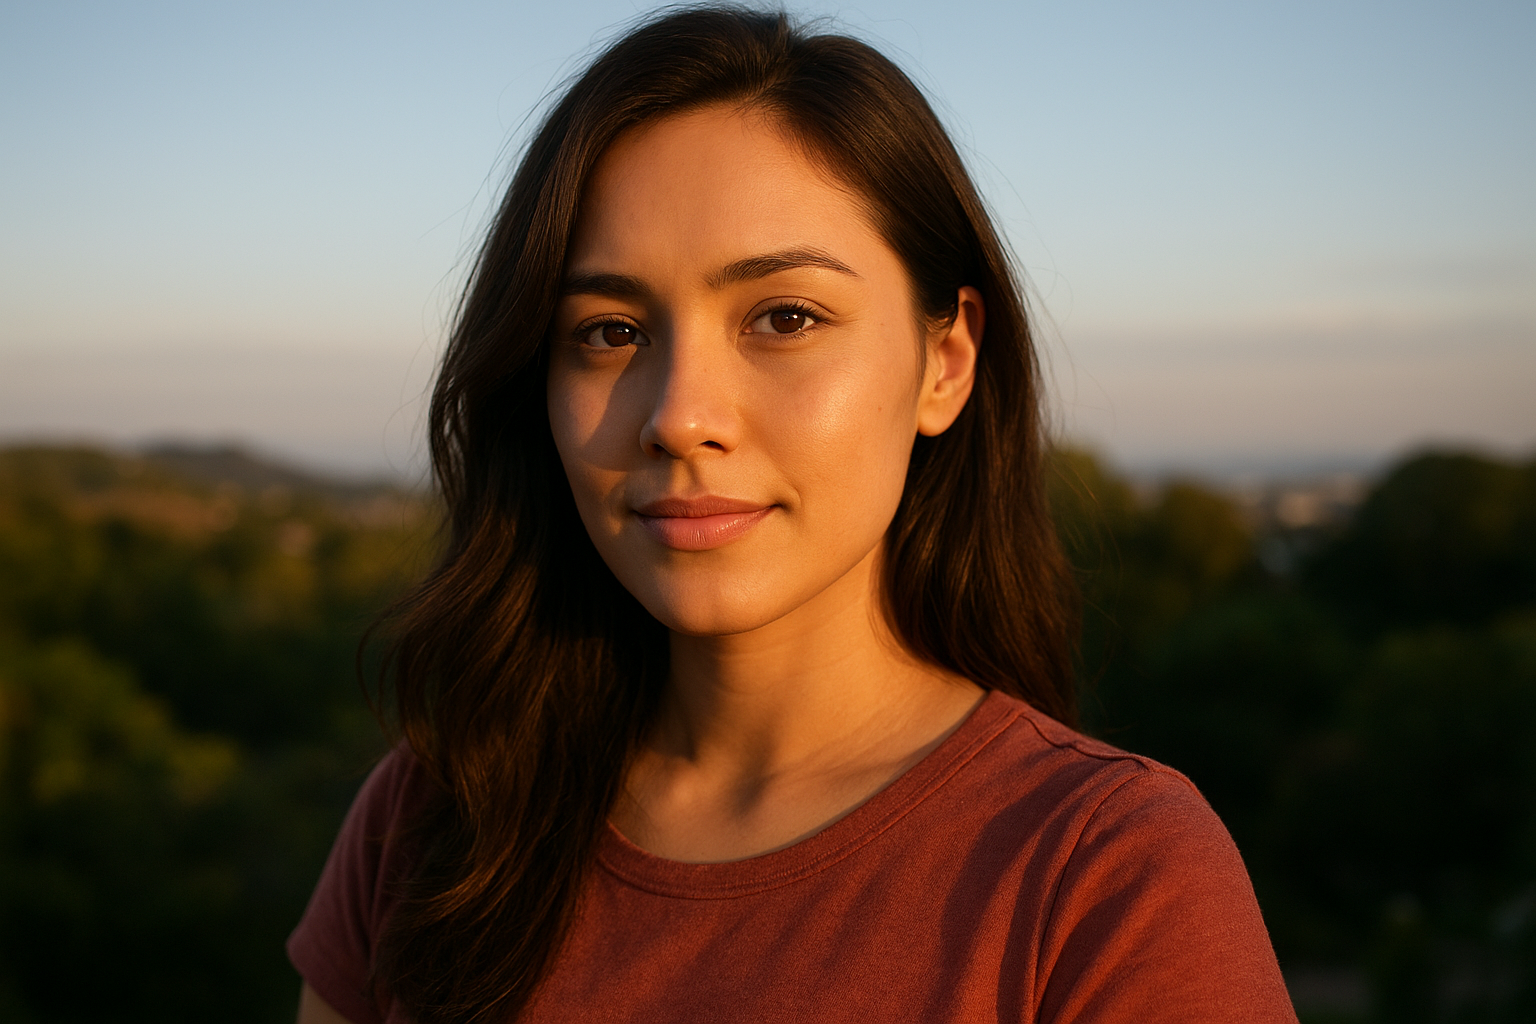
Light quality changes everything in a self-portrait. The hour after sunrise and the hour before sunset give you soft, directional light that flatters skin tones and adds depth to any background. Blue hour, the 20 minutes after sunset or before sunrise, layers cool ambient tones across a scene that no filter can fully replicate. Scheduling your solo travel photography tips around these windows costs you nothing extra and dramatically improves every shot.
Use light direction to avoid squinting and harsh shadows
Position yourself so the light source sits at a 45-degree angle to your face rather than directly in front of or behind you. This creates natural dimension without harsh shadows across your features. Facing directly into bright light forces you to squint, while shooting with the sun fully behind you flattens the image and kills contrast.
Side-angle golden hour light is the closest thing to a free studio setup you will ever find on location.
Plan sunrise vs sunset based on crowds and safety
Sunrise gives you near-empty locations at popular landmarks, which means cleaner backgrounds and no waiting. Sunset is more convenient but draws bigger crowds. Check the sun direction at your specific location using a compass or map app the evening before so you arrive already knowing where to stand.
Handle mixed lighting in cities at night
Blue hour in cities layers natural sky tones against artificial streetlights, which creates a balanced exposure without blown-out highlights. Set your camera to a fixed white balance around 3,800K to keep colors consistent across the full shoot.
Work with bad weather and still get a strong shot
Overcast skies act as a natural diffuser, spreading soft, even light across your face with no harsh shadows at all. Rain-slicked streets add reflections that improve composition. Bring a small umbrella as a prop rather than a shield, and you turn a weather problem into a distinct visual element.
4. Use your phone self-timer with burst mode
Your smartphone already carries one of the most underrated tools in solo travel photography tips: the built-in self-timer paired with burst mode. This combination costs nothing extra and removes the need for any additional accessories when you are in a pinch. Getting comfortable with these settings before your trip means you spend less time fiddling on location.
Set up 3s vs 10s timers for different scenes
The 3-second timer works best when your camera is close and you just need to step into a pre-framed shot. Use the 10-second timer when you need more distance to reach your mark, adjust your position, and settle naturally before the shutter fires.
Use burst or Live Photos to catch natural moments
Burst mode fires multiple frames per second, which dramatically increases your odds of capturing a natural expression and relaxed posture rather than a stiff, frozen pose. On iPhone, hold the shutter button or use Live Photos to grab frames. Android users can enable burst in camera settings or by holding the volume button down.
Burst mode turns one timer press into twenty possible keepers.
Lock focus and exposure so the phone does not hunt
Tap and hold on the spot where you will stand to lock focus and exposure before you start the timer. If the phone refocuses when you step into frame, your shot will be soft.
Stabilize your phone without specialized gear
Prop your phone against a water bottle, backpack, or ledge to hold your angle steady. Use a folded jacket under the phone to adjust the tilt without buying extra gear.
5. Pack a small tripod that you will actually carry
Your timer and burst mode work best when your camera stays perfectly still, and a tripod is what makes that happen consistently. The key solo travel photography tip most people miss is that the best tripod is the one you actually bring with you, not the heavy one you leave at the hotel.
Choose between tabletop, travel tripod, and flexible legs
Tabletop tripods weigh under 200 grams and fit in any bag, but they limit you to low surfaces. Travel tripods extend to full height and fold compact, which makes them the most versatile option for most destinations. Flexible-leg tripods like the Gorillapod wrap around poles and uneven surfaces, which adds creative angles that a straight tripod cannot reach.

Get the right phone mount and quick-release setup
A universal phone clamp with a standard tripod thread fits both your phone and any camera you carry, which removes the need for separate mounts. Buy a quick-release plate so you can swap between your phone and camera in seconds rather than unscrewing and rescewing constantly.
The right mount setup cuts your tripod transition time from two minutes to fifteen seconds.
Set height fast and keep horizons straight
Extend the center column last, not first, because the center column adds height but reduces stability. Use your camera's built-in horizon level to straighten the shot before you walk into frame.
Avoid wobble from wind, sand, and crowds
Press down firmly on each leg before you walk away to test stability. On sand or loose ground, push the legs deeper rather than spreading them wider to reduce tipping risk.
6. Use a Bluetooth remote to stop sprinting
Running back and forth between your camera and your mark is one of the most common frustrations in solo travel photography. A Bluetooth remote solves this completely. You set up your shot, walk to your position, and trigger the shutter from your hand without the camera ever knowing you moved. Remotes cost between $10 and $30, weigh almost nothing, and rank as one of the most practical solo travel photography tips you can act on before your next trip.
A Bluetooth remote turns a 10-second timer scramble into a clean, controlled shot every single time.
Pair and test your remote before the trip
Pairing a remote at home sounds obvious, but many travelers skip this step and discover compatibility issues at a location with no time to troubleshoot. Test your remote with every device you plan to shoot on, confirm the range covers at least 30 feet, and check that burst mode triggers correctly when you hold the button down.
Hide the remote naturally without awkward hands
Hold the remote at your side, pinched lightly between two fingers, so it disappears against your hand in photos. Alternatively, keep it in a front pocket with just your thumb resting on the button through the fabric.
Use continuous shooting for walking and motion shots
Hold the remote button down to fire a continuous burst while you walk toward or away from the camera. This produces far more natural frames than any static pose.
Keep spares and manage battery risk
Pack at least one backup remote and a fresh set of batteries. Most remotes run on CR2032 coin cells, which are cheap and easy to carry in any small kit.
7. Control a camera with your phone for perfect framing
Most dedicated cameras now offer Wi-Fi connectivity and companion apps that let your phone act as a remote viewfinder. This is one of the strongest solo travel photography tips for shooters who want precise framing control without guessing whether they are in the shot.
Set up Wi-Fi and the camera app once, then reuse it
Download your camera manufacturer's app before you leave home, connect it to your camera over Wi-Fi, and save the pairing. Sony, Canon, Fujifilm, and Nikon all offer free companion apps that mirror your camera's live view directly on your phone screen. Once you pair them, reconnecting on location takes under 30 seconds.
- Sony: Imaging Edge Mobile
- Canon: Camera Connect
- Nikon: SnapBridge
- Fujifilm: X App
Use live view to nail focus and composition
With your phone displaying a live feed from your camera, you can check framing, focus point, and exposure before you walk into the shot. Tap the subject area on your phone screen to shift focus precisely, then confirm your position looks correct before triggering the shutter.
Live view eliminates the guesswork that turns a three-shot setup into a thirty-shot ordeal.
Trigger from a distance without touching the camera
Walk to your mark, open the app on your phone, and fire the shutter remotely. You get a fully controlled shot with no sprint, no timer scramble, and no visible remote in your hand.
Troubleshoot common connection failures on the road
Airplane mode and nearby Wi-Fi networks often interrupt the camera-to-phone connection. Switch your phone to airplane mode first, then turn only Wi-Fi back on to force it to connect exclusively to your camera's network.
8. Record short video and pull still frames
Video is one of the most underused solo travel photography tips available to you right now. Instead of setting up a timer and hoping for a clean shot, you record a short clip while moving naturally through the scene, then extract the frames that look best. This method removes the pressure of landing a perfect photo in a single take and gives you dozens of usable images from one 30-second clip.
Choose the best mode and resolution for frame grabs
Shoot at 4K resolution whenever your phone or camera supports it, because a 4K frame extracts at roughly 8 megapixels, which is large enough for social media and most print sizes. If your device only shoots 1080p, the extracted frames will still work for digital sharing, but avoid heavy cropping since quality drops quickly at lower resolutions.
Higher resolution video means sharper, more flexible frame grabs without any extra effort on your part.
Move slowly for sharper frames and better poses
Fast movement causes motion blur across individual frames, which makes extracted stills look soft even on a sharp camera. Walk at a deliberate, measured pace and let your arms swing naturally so the resulting frames capture relaxed, unposed body language that a static timer shot rarely produces.
Grab multiple "keepers" from one clip
Scrub through your footage frame by frame using your phone's native editing tools or a free video app and screenshot or export the frames where your expression and posture align. One 20-second clip can yield four to six strong individual shots from a single location.
Use this method when tripods feel unsafe
Crowded markets, busy staircases, and elevated viewpoints often make leaving a camera unattended risky. In these situations, hand your phone to your bag strap, prop it against a railing, or simply record yourself walking through the space rather than setting up gear that attracts attention or gets knocked over.
9. Ask a stranger and get a good photo on the first try
Asking a stranger for help is one of the most reliable solo travel photography tips that requires zero extra equipment. Most people are genuinely willing to help for 30 seconds, but the quality of the result depends entirely on how you set up the interaction before you hand anything over.
Choose the right person and the right moment
Look for someone who is standing still and not mid-conversation, such as another tourist consulting a map or a solo traveler waiting in line. Couples and small groups are your best options because they already have a collaborative mindset and are less likely to rush you.
Use a simple script that sets expectations quickly
Keep your request to one or two sentences so the person understands exactly what you need. Say something like: "Could you take one photo of me here? I've already set it up, you just need to press this button." Specific, short instructions reduce hesitation and prevent the person from zooming in, switching modes, or moving the camera.
The clearer your ask, the better your photo.
Pre-frame the shot so they only tap the shutter
Walk to your exact position in the frame before you hand over the camera. Show them the screen with your composition already set, then confirm your focus point is locked so they cannot accidentally shift it. Their only job is pressing the shutter.
Get multiple options without being a burden
Ask them to take three shots quickly rather than requesting repeated attempts. Three frames gives you variety in expression without making the interaction feel demanding, and most people are comfortable staying for that long before moving on.
10. Swap photos with other solo travelers
One of the most overlooked solo travel photography tips is simply teaming up with another lone traveler for a quick photo exchange. You both need the same thing, and five minutes of cooperation produces far better results than any timer setup because another person can follow you, adjust framing on the fly, and capture movement that a fixed camera cannot.
Find people who also want photos
Look for solo travelers who are visibly setting up a self-timer or holding their camera at arm's length. These are your best candidates because they already understand what you need and will welcome the offer. Waiting areas near famous landmarks and popular overlooks concentrate exactly this kind of traveler.
Offer a fair trade that feels easy and normal
Lead with their photos first, not yours. Hand them your camera after you explain the swap so they feel they have already received value before they have to do anything. Keep the offer simple: "I'll take a few shots of you if you grab a few of me."
A fair exchange feels natural, and natural interactions produce relaxed, genuinely good photos.
Share shots safely without oversharing personal info
Use AirDrop or a QR code to transfer images on the spot rather than exchanging phone numbers or social media handles with someone you just met. Both methods are fast and require no personal information from either side.
Keep it quick so you both get back to exploring
Limit the exchange to five minutes total, roughly three to four shots per person. A tight window keeps the interaction comfortable and means neither of you feels trapped in an extended obligation.
11. Use tours, guides, and staff when tripods fail
Some of the best solo travel photography tips come from thinking beyond equipment. When you join a guided tour or hire a local guide, you gain access to people who are already present, knowledgeable about the best angles at the site, and genuinely happy to help you get a great shot as part of their service.
Ask your guide at the right time without disrupting
Ask your guide for a photo during a natural pause, such as a scheduled stop or a moment when the group is resting. Keep your camera ready and your composition pre-planned so the exchange takes under 30 seconds and does not pull them away from their responsibilities for long.
Use fixed photo stops to your advantage
Many guided tours include dedicated photo stops at key landmarks. These pauses exist specifically so travelers can capture the location, which means your guide expects to help and the setting is already optimized for shooting.
A scheduled photo stop is your most efficient window for a clean, well-lit self-portrait on any guided tour.
Handle attractions that ban tripods and stands
Museums, temples, and heritage sites frequently ban tripods for safety and crowd management reasons. In these spaces, hotel staff, tour staff, and on-site guides become your most practical alternative since they can hold your camera and follow simple framing instructions without violating any rules.
Keep the interaction safe and respectful
Always stay within sight of your camera and never hand over an expensive body to someone who seems uncertain. Keep interactions brief, direct, and genuinely appreciative so the person feels comfortable helping rather than obligated.
12. Master simple poses that look natural
Posing is one of the most commonly skipped solo travel photography tips, yet it determines whether a photo looks genuine or forced. You do not need to study editorial posing guides. A handful of reliable, repeatable poses applied consistently across different locations will carry every self-portrait you take.
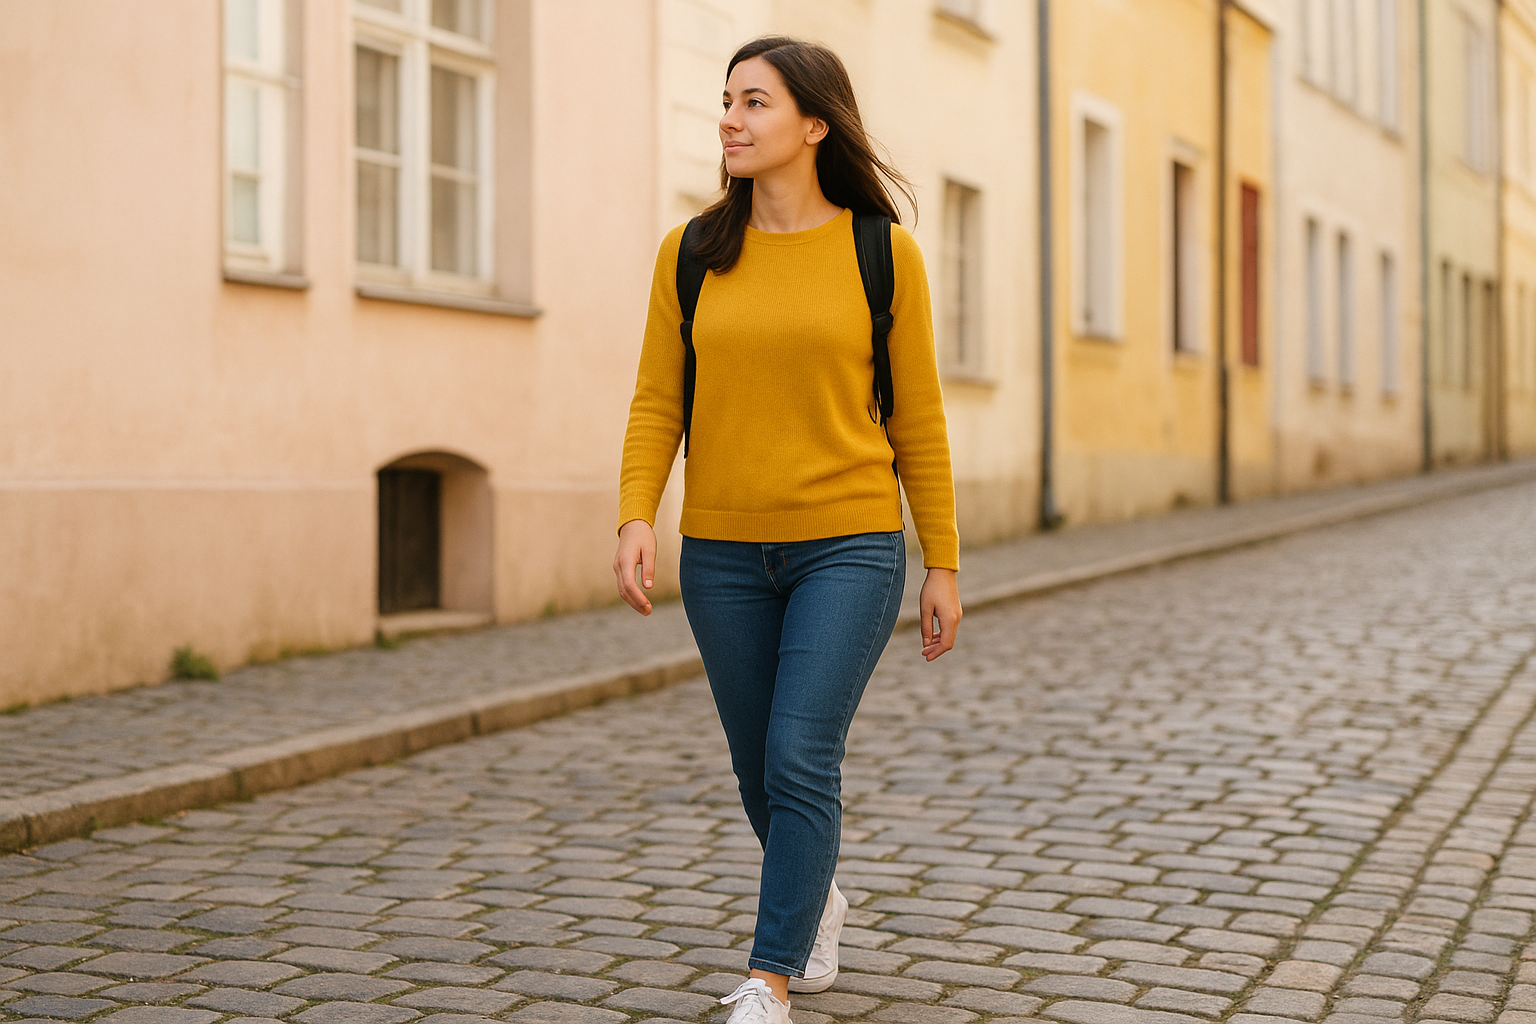
Use walking and "look away" poses to reduce stiffness
Standing still and facing the camera directly almost always produces a stiff result. Instead, walk toward or away from the lens at a relaxed pace while your remote fires a burst. Alternatively, look off to one side toward something in the background. Both approaches remove the self-conscious tension that freezes most people when they know a camera is pointed at them.
Movement and off-camera eye contact are the two fastest fixes for stiff self-portraits.
Place hands and feet so you avoid awkward limbs
Hands and feet become distracting when they hang loosely at your sides or point directly at the lens. Tuck one hand into a pocket, hold a coffee cup, or rest a hand lightly on a nearby surface to give your arms a natural reason to exist in the frame. Position your feet at a slight angle to the camera rather than squared up to reduce visual weight.
Use props that feel real, not staged
Props work when they belong to the scene. A map, local food item, or journal reads as genuine because it connects directly to the travel context. Avoid props you would never actually use in that location.
Match pose to location so the photo tells a story
Sitting on steps in a historic quarter tells a different story than standing at a viewpoint. Let the location guide the pose rather than forcing the same stance everywhere, and your photos will carry real narrative weight across the full set.
13. Protect your gear and yourself while you shoot
Safety rarely appears on lists of solo travel photography tips, but it belongs near the top. When you set up a camera and walk away from it, you create a window of vulnerability that pickpockets and opportunists look for specifically. Plan your setup with security as a non-negotiable, not an afterthought, and you protect both your equipment and your experience.
Keep valuables on you and stay within reach of the camera
Never place your camera more than 15 to 20 feet away from your position when you shoot alone. That distance keeps the gear within sprinting range if someone reaches for it. Keep your phone, passport, and wallet on your body, not in a bag you leave by the tripod.
Your camera is replaceable. Getting stranded without your documents is not.
Avoid high-risk setups in crowded or isolated areas
Busy tourist squares and empty side streets both carry specific and predictable risks. In crowds, someone can grab a tripod and walk quickly without drawing attention. In isolated spots, the absence of witnesses creates a different kind of risk for you personally. Choose locations with moderate foot traffic where you feel visible but not overwhelmed.
Use low-profile gear choices to reduce attention
A compact mirrorless camera or smartphone draws far less attention than a large DSLR with an obvious lens. Carry your gear in a plain backpack rather than a branded camera bag, which signals clearly that expensive equipment is inside.
Follow basic etiquette so you do not block others
Position your tripod against a wall or to the side of a pathway rather than in the center of a walkway. Other travelers will respect your setup far more when you respect their space first, and staff at venues are less likely to ask you to pack up if you stay out of the main flow of movement.
14. Edit and back up photos on the road
The final step in any solid set of solo travel photography tips is treating your editing and backup routine as seriously as your shooting setup. Capturing the shot is only half the job. Processing and protecting your images on the same day you take them prevents data loss and keeps your archive clean throughout the trip.
Use quick edits that improve skin tones and skies naturally
Most smartphone photos benefit from three targeted adjustments: a slight lift in shadows to open up your face, a reduction in highlights to recover bright skies, and a small boost in clarity to add definition without oversaturation. Adobe Lightroom Mobile handles all three in under two minutes per photo and syncs your edits across devices automatically.
Consistent, light edits on location beat heavy corrections applied weeks later from memory.
Fix perspective and crop for stronger composition
Shooting at a distance with a wide lens often introduces barrel distortion and converging vertical lines that make architecture look warped. Use your editing app's geometry or transform tool to straighten verticals before you crop. Crop last, not first, so you retain as many pixels as possible for the final correction.
Create a simple file workflow so you do not lose shots
Rename your files by location and date immediately after each shoot. A simple format like "Paris-20260603-001" means you can locate any image in seconds without opening every folder.
Back up to cloud and a second device when possible
Enable automatic cloud backup through Google Photos or iCloud so every image uploads overnight on Wi-Fi. Carry a small USB drive or portable SSD as a second physical copy for destinations with unreliable connectivity.
Your next solo photo set
Every technique in this guide works because it puts you in control of your own frame, your own timing, and your own story. These solo travel photography tips remove the friction between a great self-portrait and the trip you actually want to experience, whether you fire a Bluetooth remote in a Kyoto temple garden, pull stills from a video clip on a busy street in Lisbon, or swap shots with another traveler at sunrise in Marrakech.
The real shift happens when your destination works with your photography goals from the very start. NextTrip.Travel designs itineraries around content-ready experiences and visually strong locations handpicked by creators and local insiders who have shot those scenes themselves. You arrive already knowing the best spots, the right timing, and the moments most worth capturing. Book your next adventure with a plan that puts you in the photo, not just behind it.